Showing posts with label Monday Munchies. Show all posts

Friday, March 14, 2014

Monday Munchies: Vanilla Scones

Yes, I am aware that it's not Monday. I am listing this recipe as a Monday Munchies because I think it will make it easier for me (and hopefully, you) to find it later.

I make these on a regular basis. They are a favorite at my house, especially when I add chocolate chips to the recipe. Yesterday I took a basket of these scones to an event and was asked for the recipe several times. Surprisingly, when I looked for the recipe online I couldn't find it. So, by request, here is my recipe for vanilla scones.

Vanilla Scones

3 c flour
1/3 c sugar
2 T baking powder
1 t baking soda
1/2 c butter, softened
1 c vanilla yogurt
3/4 c add ins (dried fruit, chocolate chips, fresh fruit, nuts, etc.)

Preheat oven to 350°.
Mix together flour, sugar, baking powder, and baking soda. Add butter, and blend until mix resembles coarse cornmeal. Add yogurt and any add ins.  Mix gently to create dough. Turn dough onto lightly floured surface and divide into two parts.  Pat each dough half into a circle about 7" round, not quite 1" thick.  Cut each circle into 8 wedges and place wedges, slightly separated, on baking sheet.  Bake 15-20 minutes until lightly browned.

If dried fruit is used plump the fruit by covering the fruit with warm water and letting it stand for 10 minutes.

In a pinch you can substitute any flavor of yogurt for vanilla.  You can also substitute up to 1/2 c sour cream for the same amount of yogurt.

Monday, March 4, 2013

Monday Munchies: Buffalo Cauliflower


Spicy Buffalo Cauliflower 'Wings'


1 cup water
1 cup flour
2 tsp. garlic powder - I used Mrs. Dash and garlic pepper
1 head of cauliflower, washed, dried and chopped into pieces
1 cup hot sauce
1 Tbsp. olive oil

Preheat the oven to 450°F.
Combine the water, flour, and seasoning in a bowl and stir until well combined.
Coat the cauliflower pieces with the flour mixture and place in a shallow baking dish. Bake for 18 minutes.
While the cauliflower is baking, combine hot sauce and olive oil in a small bowl. Use a basting brush to cover cauliflower with hot sauce then continue baking for an additional 5 to 8 minutes.

This recipe came from the PETA website.

Monday, February 25, 2013

Monday Munchies: Pretzels

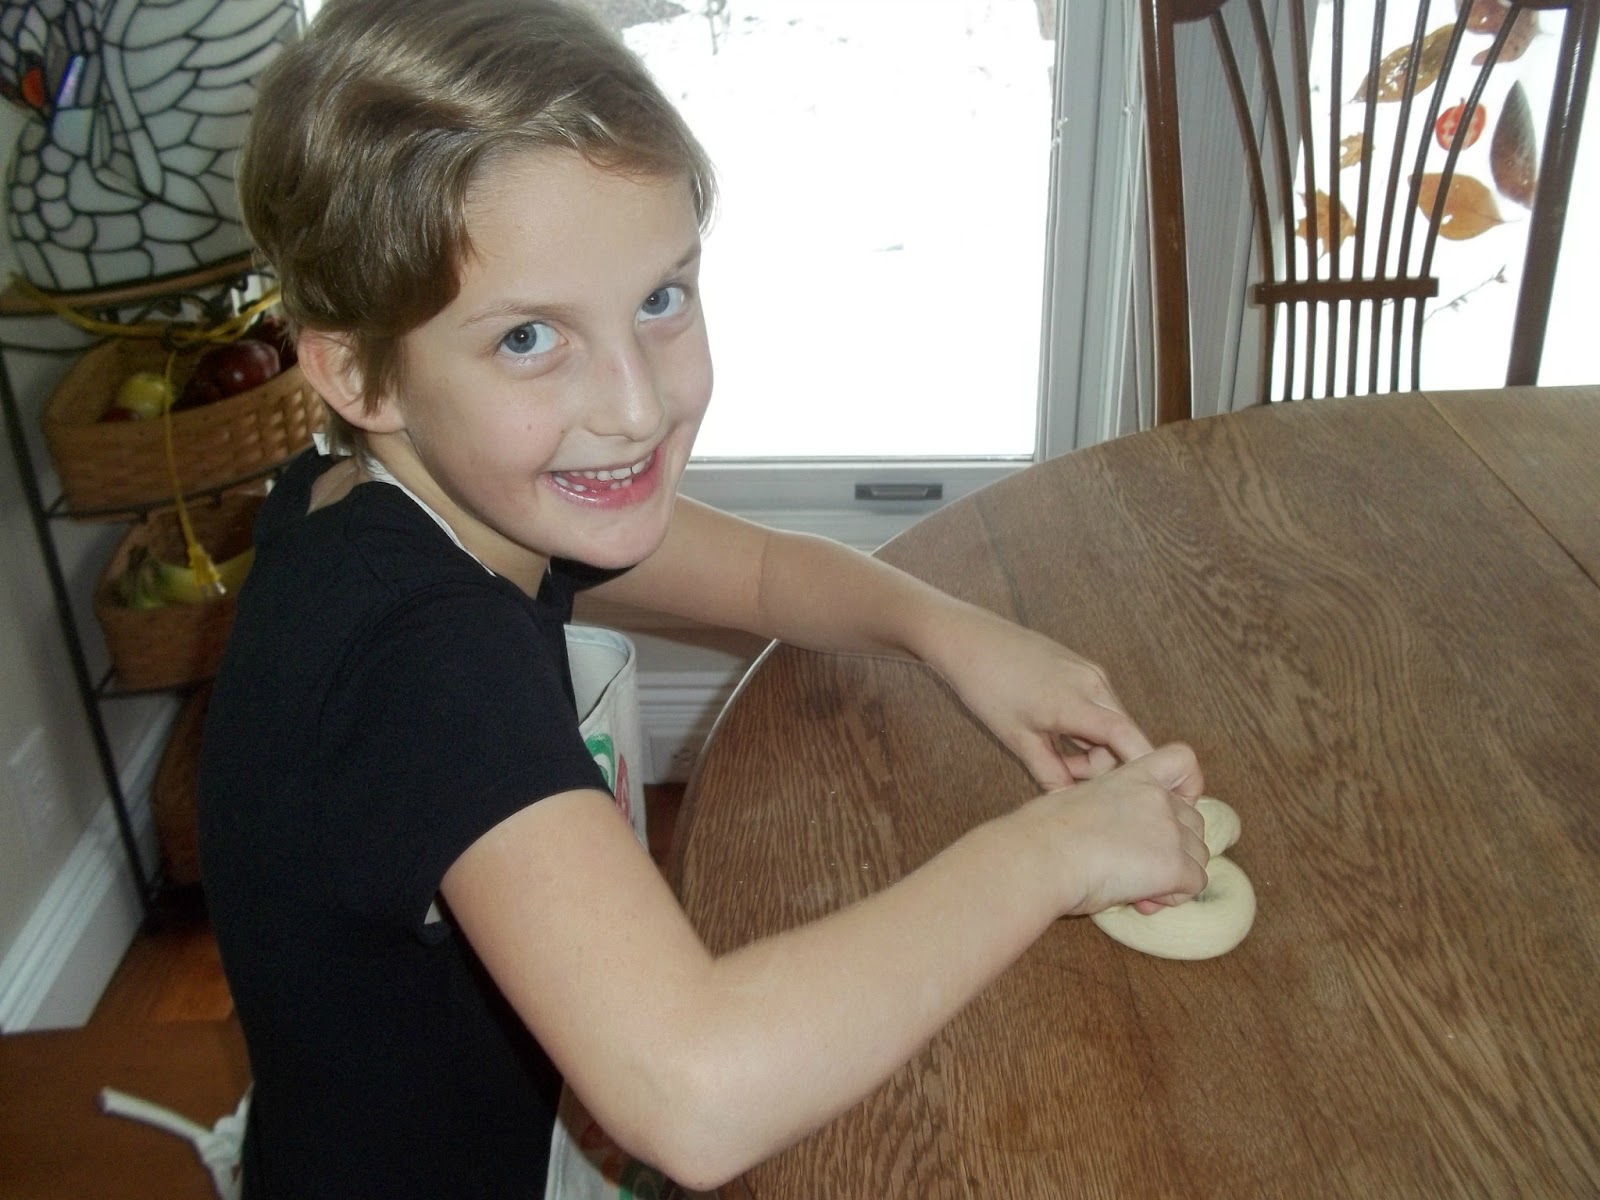
We used the soft pretzel recipe created by Alton Brown on the Food Network.  Those of you that know me will find this difficult to believe, but I followed the recipe and didn't change a thing.  When it comes to making pretzels I had absolutely no idea what I was doing and didn't want to screw it up.  Adhering to a better safe than sorry philosophy of pretzels paid off and we created magic. 


Monday, February 18, 2013

Monday Munchies: Beer Butt Chicken

A while back I posted about how to roast a chicken.  That is my go-to recipe for making chicken.  Only slightly less used at our house is the beer butt chicken technique.  I originally heard about doing this on the grill.  Coat your chicken in melted butter, slather on the salt and other seasoning, insert the beer can and cook on the grill until done.  It usually takes about an hour at 350-400 degrees. 

Grilling is amazing but sometimes it's not pleasant.  Right now grilling would be especially unpleasant so I opt for using the beer butt technique in the oven.  These handy beer can holders that I bought are convenient but not strictly necessary.  I have two of them.  If I'm cooking a third chicken I place it in between the two chickens on the can holders.  I pour out 1/3 to 1/2 of the beer.  Usually I opt to pour the beer into a glass for later consumption.

The chicken slips, bottom opening first, over the can and holder.
Before cooking I sprinkle the chicken with a saltless seasoning.  Since Rob's heart issues we have cut way back on butter and salt so I forgo the slathering and coating.  The chicken is still tasty and way more healthy.   

I like it when my chickens look chummy so I arrange them for conversation. 

I drop the lowest shelf of my oven all the way to it's lowest setting in order to accommodate the upright chickens.  While the chickens are cooking (375 degrees for an hour) I enjoy the beer I set aside earlier.

With no more fuss, the chicken is done and fall off the bone tender. 

Monday, February 11, 2013

Monday Munchies: Hot Cocoa Mix

I ran out of cocoa mix on a snowy day.  Not a good move for someone trying to win the mother of the year award.  When I mentioned my distress to my husband, he told me that his mother made something called "Girlscout cocoa" that was the best cocoa ever.  That information sent me on a search. 

Here's the recipe I decided to try.  As you can guess, I changed it a bit because that's the way I do things.

Hot Cocoa Mix
Makes 5 1/2 cups of dry mix

2 cups powdered sugar
1 cup cocoa powder
2 1/2 cups powdered non-fat milk 
2 teaspoons cornstarch


The recipe was approved by one of my children.  The other two who tried it said the cocoa tasted like coffee.  This is their way of telling me that they wanted more water and less mix.  We are in the middle of several snowy days.  I'm sure we will soon be trying the new recipe again, with less mix.  I'll let you know how that goes.

If you like this recipe head on over to Frugal Mama and get the large batch instructions for gift giving.

If you want a different recipe, my cocoa can had this recipe on it.


Mix together:
1 cup powdered sugar
1/2 c cocoa powder
1/1/3 c nonfat dry milk (dry)
Makes 2 1/4 c dry mix.  Add water to make 9 6fl.oz. servings.

Monday, February 4, 2013

Monday Munchies: Brownie Batter Dip

This recipe is brought to you thanks to H13.  She made it last night as part of our Super Bowl snacks.  If your family is like ours, the food and the commercials are the main reason for watching the game.  With that understanding, you can see how important it is to make the food good.  H13 certainly came through with this tasty treat.

You can find the recipe here at Our Every Day Dinners but I wanted to post it again so you don't have to go looking.  I would recommend that you check out the site though.  There's lots of good stuff there. 

Brownie Batter Dip

1 8 oz package softened cream cheese

1/2 cup softened butter
2 cups powdered sugar
heaping 1/4 cup cocoa powder
heaping 1/4 cup flour
3 tablespoons brown sugar
1 teaspoon vanilla
2 tablespoons milk, adding more if needed

Mix the cream cheese and butter with an electric mixer. Add the powdered sugar and milk slowly. Add the cocoa, flour, brown sugar, and vanilla, and mix well.

We served the dip with pretzels, graham crackers, and unsweetened banana chips.  The unsweetened banana chips are, frankly, nasty on their own, but they were just right with this dip.

Also, we didn't have any powdered sugar.  A few years ago that missing ingredient would have sent us searching for another recipe.  We've come a long way in the do it yourself department so H13 made her own powdered sugar.  And guess what, powdered sugar is just regular sugar... wait for it... powdered.  Who knew?!  If you need powdered sugar you put the equivalent amount of white sugar in a blender and blend/pulse until you have sugar that is... you guessed it ...powdered.  I know, it's amazing, isn't it?!  If you want a more serious set of instructions check here but the ones that I've given really do work.

Anyway, with or without the diy powdered sugar this brownie batter dip really is worth making and sharing.

Monday, January 28, 2013

Monday Munchies: Godiva Chocolate Cheesecake

Valentine's Day is coming up and I'm giving you the perfect Valentine's gift for anyone that loves chocolate.  Or you can make it for yourself and pretend it's for your special someone.  Or you can just make it for yourself and forget about pretending.

This Godiva Chocolate Cheesecake is my go to for impressive, decadent desserts.  It's not difficult to make.  It tastes just as amazing without the topping as it does with, so you don't need to get all fancy.  I use whatever chocolate I can pick up at my local grocery store.  Good quality always makes a better cheesecake but I've used store brands and no one minded.

Chocolate Cheesecake

Yield: 12 servings
Difficulty: Easy
Preparation: 1 hour plus baking, cooling and chilling time

Chocolate Wafer Crust
1 1/4 cups chocolate wafer cookie crumbs - That's about 12 cookies.  I use oreos or the store brand equivalent.
5 tablespoons butter, melted

1. Preheat oven to 325°F. Tightly wrap bottom of 9-inch springform pan with heavy-duty aluminum foil.
2. Mix together cookie crumbs and melted butter in bowl until combined. Press mixture into bottom of prepared pan. Refrigerate crust while preparing filling.

Filling
8 bars (1.5 ounces each) GODIVA Dark Chocolate, coarsely chopped - That's 12 oz. for the math phobes out there.  I've used dark chocolate chips and they work beautifully.  In fact, I recommend them and skip the chopping.
2 packages (8 ounces each) cream cheese, softened
1 cup granulated sugar
4 large eggs, at room temperature
1/2 cup brewed hot coffee
2 teaspoons vanilla extract

1. Place chocolate in microwave-safe bowl. Microwave on medium (50% power) for 1 minute. Stir. Microwave 30 seconds more or until chocolate is softened. Stir until smooth and let cool.

2. Beat cream cheese in mixing bowl until creamy, using electric mixer at low speed. Gradually add sugar and beat until blended. Add eggs, one at a time, beating after each addition. At low speed, slowly beat in the coffee. Beat in vanilla and melted chocolate until blended. Pour mixture over crust. Place cheesecake in roasting pan. Pour boiling water into roasting pan so that the water comes halfway up the side of the springform pan. Do NOT skip this.  It's part one to a perfect cheesecake. 

3. Bake for 60 to 70 minutes or until center is firm. Leave cheesecake in the oven and turn off the oven. Prop oven door open and allow cheesecake to cool in the oven for 1 hour. This is part two to a perfect cheesecake.
4. Remove cheesecake from roasting pan. Cool cheesecake in the pan on wire rack. When cheesecake is cooled, cover pan with aluminum foil and refrigerate at least 6 hours or overnight.

As I said, you don't have to garnish.  This cheesecake is more than good enough to stand alone.  However, if you are going to garnish, DO IT RIGHT!  DO NOT PUT COOL WHIP or any kind of WHIPPED TOPPING or CANNED WHIPPED CREAM ON THIS CHEESECAKE!!!!!  It is so worth the minimal effort to make real whipped cream because, no matter what it says on the packaging, that premade/fake stuff is NOT as good as the real thing.

Whipped Cream Topping
1 cup heavy cream
1 tablespoon granulated sugar
1 teaspoon vanilla extract

1. Loosen edge of cheesecake with a knife. Remove side of springform pan.

2. Beat cream, sugar and vanilla in mixing bowl until stiff peaks form, using electric mixer at medium speed. Reserve 1 cup whipped cream for garnish. Spread remaining cream over top of cheesecake. Sprinkle with grated chocolate.

3. Fill a pastry bag fitted with a large closed star tip (such as Ateco #5) with reserved whipped cream. Pipe a border of rosettes around edge of cheesecake. Decorate with chocolate coffee beans.

4. Cut cheesecake into wedges.

Garnish
GODIVA Dark Chocolate, grated
Chocolate Coffee Beans


Monday, January 14, 2013

Monday Munchies: Butternut Squash Soup

One of the things that I enjoy about my cooking is my ability to re-purpose leftovers in a way that my family will eat them.  My family is not a family that enjoys leftovers.  Other than pizza, they would all be happy never to have a second helping of a meal, especially if it is served a day or two later.  Dealing with that pickiness requires patience and creativity on my part. 

Right now, my refrigerator is full to overflowing.  My goal with dinner tonight is to use what I have on hand to create a meal that is new and appealing to the majority of my family.  I have half a loaf of multi-grain bread in the pantry.  I also have a variety of antipasto treats; pepperocini, salami, olives, roasted red peppers.  That makes a good starter. 

I don't have enough meat of one kind to reserve but I do have six cups of chicken broth that I made from last week's beer butt chicken.  I also have about 8 dozen eggs.  We had quiche yesterday for breakfast so no one is really interested in more eggs for dinner tonight.  I also have six cups of roasted butternut squash from dinner last week.

A quick search on allrecipes.com and I have this recipe for Butternut Squash Soup.


As you know, I can't leave well-enough alone so I am changing a few things.  Here is my recipe for Butternut Squash Soup:

1/2 onion, finely chopped
2 tablespoons margarine
6 cups peeled and cubed, roasted butternut squash
4 cups chicken broth, divided
1/2 teaspoon dried marjoram
1/4 teaspoon ground black pepper
1/8 teaspoon ground cayenne pepper
2 (8 ounce) packages light cream cheese or Neufchatel

In a large saucepan, saute onions in margarine until tender.
Using a blender puree squash with 1/2 to 1 c of chicken broth and cubed Neufchatel.  This took me two batches.
Add remaining chicken broth to sauted onion.  Stir in blended squash and cheese mixture.
Add marjoram, black pepper and cayenne pepper to soup and heat through. Do not allow to boil.

I have been warming my soup for about an hour on the stovetop to allow the flavors time to meld and Rob time to get home from the gym.  I am pretty sure dinner will be a hit tonight.  The best part is that I've gotten three plastic containers out of my refrigerator.  It's nice to be able to open and close the door without fear of an avalanche.

Follow up:  The soup was a hit with six out of seven diners.  I doubt it will be a regular feature on our menu but it was a delicious way to use the butternut squash and an easy, different recipe to pull out every now and then.

Monday, January 7, 2013

Monday Munchies: The Perfect Pot Roast

There are several things you need to understand about this post right from the start.  First, I hate pot roast.  Second, we grow our own cows.  When you grow your own cows you don't really get a supermarket selection of meat.  We eat what we grow and so we eat pot roast.  Third, I hate pot roast.

That being said, I am going to introduce you to a woman that loves pot roast and has, in my opinion, created a pot roast that is as close to perfect as anything made with a pot roast can be.  I still don't love it but I don't hate serving it and I've even been known to take a bite or two.

Without further delay, click right here and join Ree and her perfect pot roast.  Even if you don't cook, the pictures are enough to make you wish that you did.

Monday, November 19, 2012

Monday Munchies: Pumpkin Pie

It seems like I just can't stop the pumpkin.  This weekend I made a pumpkin coffee cake and a pumpkin pie.  Here is the recipe for the pie.  I'll be using this recipe from now on. It's simple and delicious.

Perfect Pumpkin Pie
1 1/2 cups pumpkin puree, fresh
3/4 cup sugar
2 t pumpkin pie spice
1 teaspoon all-purpose flour
2 eggs, lightly beaten
1 cup evaporated milk
1 teaspoon vanilla extract
1 unbaked pastry shell (9-inch)

Combine pumpkin, sugar, salt, spices, and flour in a mixing bowl. Add eggs; mix well. Add evaporated milk and vanilla; mix well. Pour into pastry-lined pie pan. Bake at 400° for 15 minutes; reduce heat to 350° and bake about 35 minutes longer, or until center is set.

Monday, November 12, 2012

Monday Munchies: Homemade Granola Bars

As I was searching for granola I discovered that I could also make my own granola bars.  The recipe I started with was an adaptation of a King Arthur Flour recipe posted by Smitten Kitchen

Since I'm unable to follow a recipe I didn't follow the one from Smitten Kitchen but it gave me a good start.  Below I'm going to share my adaptation of the recipe and make a few suggestions for giving it another try.  While these granola bars were good, I think they could be even better.

Homemade Granola Bars - First Try

2 cups rolled oats 1/2 cup granulated sugar

1/2 teaspoon ground cinnamon
2 to 3 cups dried fruits and nuts - I used 2 cups of dried mixed berries and 1/2 cup of flax seeds
1 teaspoon vanilla extract
1/2 cup vegetable oil
1/4 cup honey
2 tablespoons light corn syrup
1 tablespoon water

Preheat the oven to 350°F. Line an 8″ x 8″ x 2″ pan in one direction with parchment paper, allowing it to go up the opposing sides.

Stir together the dry ingredients, including the fruit and nuts. In a separate bowl, whisk the vanilla, oil, liquid sweeteners and water. Toss the wet ingredients with the dry until completely mixed. Press evenly into prepared pan.
Bake the bars for 30 to 40 minutes.  The top and edges should be brown.  The bars will still be soft but will set as they cool. 

Cool the bars in their pan then lift parchment paper out of pan and allow to cool completely on a cooling rack.
Once cool, cut the bars into squares and store in an airtight container.


Now for the suggestions for the second try.  This was a little too sweet and sticky for us.  Next time I'm going to drop the corn syrup and put in chocolate chips.  I also plan to make these with banana and peanut butter.  I'll be adding 1/3 c of peanut butter, 1/2 cup of dried bananas and 1/4 cup of mashed banana in place of 1/4 cup of oil.  I'll let you know how it goes.

Monday, November 5, 2012

Monday Munchies: Homemade Granola

With our heart healthy lifestyle changes were required in all our meal habits.  Breakfast was a biggie.  Rob ate what he called the breakfast of champions, a six pack of chocolate mini donuts and a Mt. Dew from his favorite convenience store.  The good thing about this breakfast choice was that improvement was a given.  It's hard to come up with a less nutritious breakfast choice.  The kids and I usually did better for breakfast, mostly because we had more time.  Pancakes, eggs, muffins, scones, cereal, yogurt, fruit. 

As Rob changed his diet and started looking for easy before work breakfast food he discovered he enjoyed Cracklin' Oat Bran cereal and granola.  The challenge was keeping granola around that everyone enjoyed and at $4+ per box that can get pricey pretty quickly.  This child didn't like coconut.  That one hated raisins.  You get the idea.

Imagine my surprise when it occurred to me that I could make granola.  My sister made granola for years so I asked for her recipe and promptly misplaced it.  Instead of asking her to send it again I went on a search.  After seeing her recipe, I knew I was looking for several things in my granola recipe.  The first was to minimize the stirring.  The second to maximize the amount of granola so I could make it less often.

I found "my" granola recipe at The Finer Things in Life.  Of course, I'm unable to follow a recipe and granola is perfect for ad-libbing.  I'll give you my recipe at the end of the post.

The first thing you need for this granola recipe is a really large bowl.  There is some stove top cooking involved in making the granola sweet  My smallest sauce pan was perfect for that. After you toss the sweet with the oats and mix your add-ins you'll need three large pans on which to bake your granola.  I recommend sides on your baking pans because stirring, even though you only do it once, can be messy.

I made two varieties of granola.  Two large pans were made with flax seeds, coconut, and crushed slivered almonds.  I added dried cranberries to these after they were done baking.  The other pan was plain.  Raisins went into this batch after baking.

Here is one of three large pans of granola on the morning after.

I chose to store my granola in gallon size ziploc bags.  I will probably invest in different, reusable containers since the granola was given two thumbs up.

Homemade Granola


1 c oil  I used vegetable but you could use what you like.  Coconut was recommended in the original recipe but that's pricey and impossible challenging to find in my area.1 c honey
½ c brown sugar
1 T vanilla
2 t cinnamon
15 cups (one 42 ounce box) old fashioned oats

Mix oil, sugar, and honey in a small saucepan. Bring to a low boil.

Remove from heat. Stir in cinnamon and vanilla.  I had an iffy moment here because my vanilla caused everything to boil up and almost out of the pan.  I make my own vanilla so I'm guessing that the lower boiling point of the vodka caused the ruckus.  My recommendation is that if you make your own vanilla you might want to let your sweet stuff cool a bit before you add the vanilla.

Mix oats and any dry add ins in a large bowl. You don't want to dried fruit or meltable things like chocolate chips in until after you bake. 

Pour the sweet stuff over the oat mixture and stir to coat.

Spread oats in three 9×13 pans.

Bake at 375° for 10 minutes.  Stir granola carefully with a spatula so that none is sticking and everything has a change to brown. Return pans to oven. Turn oven off.

The granola will be ready when your oven is cool.  This is easiest if you put the granola in the oven at night and then get it out in the morning.  It's not enough to wait for the oven temp to go down.  The oven needs to be completely back to room temperature cool inside.

I found my favorite instructions for adding variety to granola at The Daily Muse.  The basic gist is that you can add in whatever you like 1/2 c at a time for a recipe that uses 3 c of oats.  Since my recipe uses 15 c of oats I adjusted accordingly.  I chose to add a 1 1/2 c  flax seeds for the Omega 3 oils, almonds for the good protein, coconut and cranberries because I think they are so tasty.

I am getting ready to mix my second large batch of granola.  It took about two weeks for us to eat the last batch.  Our granola consumption may decrease as it becomes a staple but for right now everyone is really benefiting from our nutrition choices and our own personal versions of granola.

This week I'm going to try making my own granola bars.  Check back soon to see how those turn out.  In the meantime, feel free to share your favorite granola recipes or add-ins.

Monday, October 29, 2012

Monday Munchies: Pumpkin Goodness

One of the challenges of keeping two blogs is that I must decide the most appropriate place to post the things I write about.  The farm blog is for farm.  This blog is for everything else.  The tricky part is that farm and life seem to intersect much of the time. 

On The White House Farm blog I wrote about some of the things I do with the produce purchased at the local produce auction.  An obsession with dirt cheap pie pumpkins turned into a series of posts sharing recipes that will delight any pumpkin lover. 

Just in case you haven't been to my farm blog, I thought I'd link the recipes here so that you can go check it out and enjoy all the pumpkin goodness for yourself.


Chocolate Chip Pumpkin Cookies

Monday, October 15, 2012

Monday Munchies: The Search for a Replacement Muffin

For the last few months I've been looking for a replacement for Cinnamon Muffin Melts.  When I decided to give up my business there were two things I knew I'd miss; the discount on food we'd grown to love and the other consultants I'd come to know.  I am hoping that the relationships that count will remain.  When I found a recipe for beer bread that was just as good as the one I'd been making I knew there was hope.  The other baked good staple around our house is the Cinnamon Muffin Melt. I'll be referring to them as CMM. 

Thanks to Pinterest and Google I've found a large selection of recipes that may or may not be like our beloved CMM.  An acceptable replacement needed to be light and airy, cinnamon sugar delicious with a hint of nutmeg or something to add just the right flavor.

I've tried several recipes.  Some have been total misses.  I won't share those with you.  Some, like this one, are tasty but not exactly what I was trying to find.  Finally, a friend posted French Breakfast Muffins on Pinterest.  I made them this morning and they totally fit the bill.  I made a few changes because I am unable to follow a recipe so here is my new recipe for Better than Cinnamon Muffin Melts.


Muffin:
1 c. sugar
3 c. all purpose flour
1 T. baking powder
1/2 tsp. nutmeg
2/3 c. butter, melted

2 eggs
1 tsp. vanilla

1 c. milk

Topping:
1/2 c. sugar
1 tsp. cinnamon

/1/2 c. butter, melted

Preheat oven to 350F.

In a large bowl, stir together all dry ingredients.

In a small bowl whisk together wet ingredients.
Tip: If your butter is warm and your milk is refrigerator cold put the milk in the microwave and heat it for a few second to bring it to room temperature before adding.

Add wet ingredients to dry ingredients and stir gently just until combined, but still a bit lumpy.
REALLY IMPORTANT TIP: DO NOT OVERMIX!!!!

Scoop batter into mini muffin tins that have sprayed with cooking spray.  You should get about 48 mini-muffins.  Bake for 12-15 minutes, or until they just start to turn a bit golden at the edges.
Another tip:  You can also make regular size muffins.  Just increase your baking time to 20-25 minutes.

For the topping, mix sugar and cinnamon in a small bowl. Place melted butter in another small bowl. Dip the warm muffins in melted butter then dip the muffin in cinnamon sugar. You'll find a lovely, warm, anticipatory rhythm to this process.  Dip, dip, plate.  Dip, dip, plate.  Until all 48 are setting in a lovely arrangement ready to be savored.   This morning I had a beautiful plateful of muffins ready for breakfast.  Since the recipe from the link above was smaller it made just one pan of mini-muffins.  This was perfect for us today because it was a weekday and only four of us were home.  I knew that if this were the CMM replacement we'd clean the plate.  It's good to think ahead sometimes.    It was especially good to think ahead this time because by the time I grabbed my camera, this was what was left of our Better than CMM.  

Monday, May 21, 2012

Monday Munchies: Pizza Dough

There is something about writing a recipe for something I make regularly that is a challenge.  What comes naturally in the kitchen requires thought on paper.  This is the recipe for pizza dough that I make every Saturday evening.  This dough can also be left to rise and used for bread, rolls, cinnamon rolls, etc.  I've done all those things with it and more but most often it's used for pizza.  For me, making it is much easier than writing it down.

3/4 c dry milk
approx 2 c warm water
1 T yeast
2 1/2 T sugar
2 T oil
6 c flour

Put 3/4 c dry milk into a large measuring cup.  Add warm water until level is 2 cups.  I use warm tap water the key is to get the water warm enough to grow the yeast but not so warm as to kill the yeast.  For me, my tap water left to run awhile is perfect temperature.  If the water is warm to the touch but not hot enough to burn it should be about right.  Add 1 T yeast and 2 1/2 T sugar to milk and stir. 

I use yeast in a jar, hence the measurement.  If you are using packages of yeast, just one package will do.  If you are going to use your dough for something besides pizza dough, i.e. if you intend to let your dough rise, this is where you let the yeast mixture rest.  Within 5 minutes or so the yeast mixture should start to increase or bubble a bit.  This is called proofing your yeast.  For pizza that step doesn't matter so much but for rolls or other baked items it matters a great deal.

Measure four cups of flour into a large bowl.  I received a Kitchen Aid mixer for Christmas.  My large bowl is now the mixer bowl.  Before it was just a big metal bowl and I did all my mixing by hand.  Either method makes great dough. 

Add 2 T oil to the yeast mixture.  Stir.  Any kind of lightly flavored oil works fine.  I most often use olive oil but have used vegetable and canola oil. 

Pour yeast mixture into large bowl of flour.  Mix well until soft dough forms.  Add flour to dough mixture until dough is no longer sticky.  This will equal about 6 cups of flour.  The texture of this dough seems to vary with the weather.  Sometimes it's still, sometimes very pliable.  Either way it makes delicious pizza.

I use the Pampered Chef large round stones to bake my pizza.  This recipe makes 3 large pizzas if I make thin crust.  Two large pizzas and a 9" round personal pizza if I make thicker crusts.  Top with your favorite toppings and bake in a preheated oven.  I bake it at 350 in my convection oven.  If you have a regular oven boost the temperature to 375.  Bake for 15-20 minutes or until cheese is the desired doneness.


Monday, May 14, 2012

Monday Munchies: Roasted Chicken

Here's the sad thing.  Until six months ago, I had no idea how easy and delicious roasted chicken was.  I had never, ever cooked a whole chicken.  I bought skinless, boneless frozen chicken breasts because I hated handling raw meat.  Then we bought the farm and raised a hundred chickens.  We butchered 96 of those hundred and handling raw meat was no longer an issue.  What to do with lots of frozen, whole chickens became the issue. 

To use chicken in the recipes I'd favored in life before the farm I needed several pounds of chicken breasts.  Our chickens didn't provide breast meat like that so my cooking needed adjustment.  A friend recommended we try beer butt chicken.  I tried it and we loved it.  I brush my constipated chickens with butter, sprinkle them with seasoning and cook them in the oven two or three at a time.  I use the oven rather than the grill mainly because we started cooking chicken this way in December and I'm not wild about manning the grill for an hour in cold weather. 

One day I needed to cook two chickens for dinner and had no beer in cans.  Rather than run out to the store I decided there had to be something else I could make.  There was and it tunred out to be easier than popping the top on a can of beer, roasted chicken

Here's the the happy thing.  Not only is roasting a chicken super easy but it looks very impressive. Plus, I got to learn a new skill, how to truss a chicken. I  love learning new things! I also love it when the food I make looks and tastes great.

For those of you that have been roasting chicken for years, three cheers to you.  For those of you that never purchased a whole chicken before, be brave.  You just might love it. 

Monday, April 30, 2012

Monday Munchies: Chocolate Chip Cookies

My family is full of chocolate chip cookie snobs. Truthfully, my mother does make the world's best chocolate chip cookies. She swears she follows the Tollhouse recipe but we all know that she has a secret ingredient because our cookies using that recipe never quite taste like mom's.


This week I made chocolate chip cookies using a knock off brand of chips that had a recipe on the package. Being too lazy to look for another recipe, I used a bit of the recipe on the package and winged the rest. Those cookies were the best I have ever made. I'm not sure they were as good as mom's but they were really, really close.

Almost Mom's Chocolate Chip Cookies

2 1/2 c flour
1 t baking soda
1/2 c butter, softened
1/2 c shortening
3/4 c sugar
3/4 c brown sugar
2 eggs
2 t vanilla
2 c semi-sweet chocolate chips

Mix butter, shortening and sugar with an electric mixer until fluffy, about 2 minutes. Add eggs one at a time mixing well after each addition. Add vanilla, mix well. Combine flour and baking soda. Gradually add flour/baking soda mixture to sugar mixture. Continue mixing until flour mixture is well incorporated. Stir in chocolate chips by hand. Scoop onto cookie sheet and bake in 375 oven for 12-14 minutes or until light brown. Allow to cool slightly on the pan then transfer to rack to finish cooling.

Monday, April 23, 2012

Monday Munchies: Chocolate Chip Banana Muffins

This recipe began with a basic banana loaf recipe found in my favorite Southern Living Cookbook.  My children will tell you that it's good enough to be served in a bakery.

1 3/4 c of flour
3/4 t baking soda
3/4 c sugar
1 1/4 t cream of tartar
2 eggs, beaten
1/2 c vegetable oil
2 ripe bananas, mashed
1/2 c to 1 c chocolate chips

Preheat oven to 350.
Mix first four dry ingredients. Make a well in dried ingredients.
In a small bowl mix remaining ingredients. Pour wet ingredients into well of dried ingredients.  Fold gently until all ingredients are moist.  Fold in chocolate chips.
Spoon batter into muffin cups.
Bake for 20-25 minutes or until golden brown.
Makes a dozen muffins.

Monday, March 26, 2012

Monday Munchies: Southern Living Chocolate Chip Coffee Cake

I received The Southern Living Cookbook as a wedding gift.  For the past 25 years it has been my trusted source for delicious food.  This recipe for Chocolate Chip Coffee Cake is a family favorite.  You'll find us eating it while we watch the Macy's Thanksgiving Day Parade and the Rose Bowl Parade.  It's also the breakfast request on most birthdays.

Chocolate Chip Coffee Cake

2 c flour
2 t baking powder
1 1/2 c sugar
1/2 c butter, softened
2 eggs
3/4 c milk
1 t vanilla
6 oz chocolate chips

Combine flour, baking powder, sugar and butter in bowl and beat at slow speed of a mixer until mixture resembles fine crumbs.  Set aside 1 cup of crumb mixture.

Add eggs, milk and vanilla to remaining crumb mixture.  Mix well. 

Pour batter into greased 7x11 pan.  Sprinkle with chocolate chips.  Top with reserved crumb mixture.

Bake in 350* preheated oven for 35-40 minutes.

Cool slightly and serve.
My children actually prefer this one cool so making it the night before suits them fine.

Monday, March 19, 2012

Monday Munchies: Rainbow Cupcakes

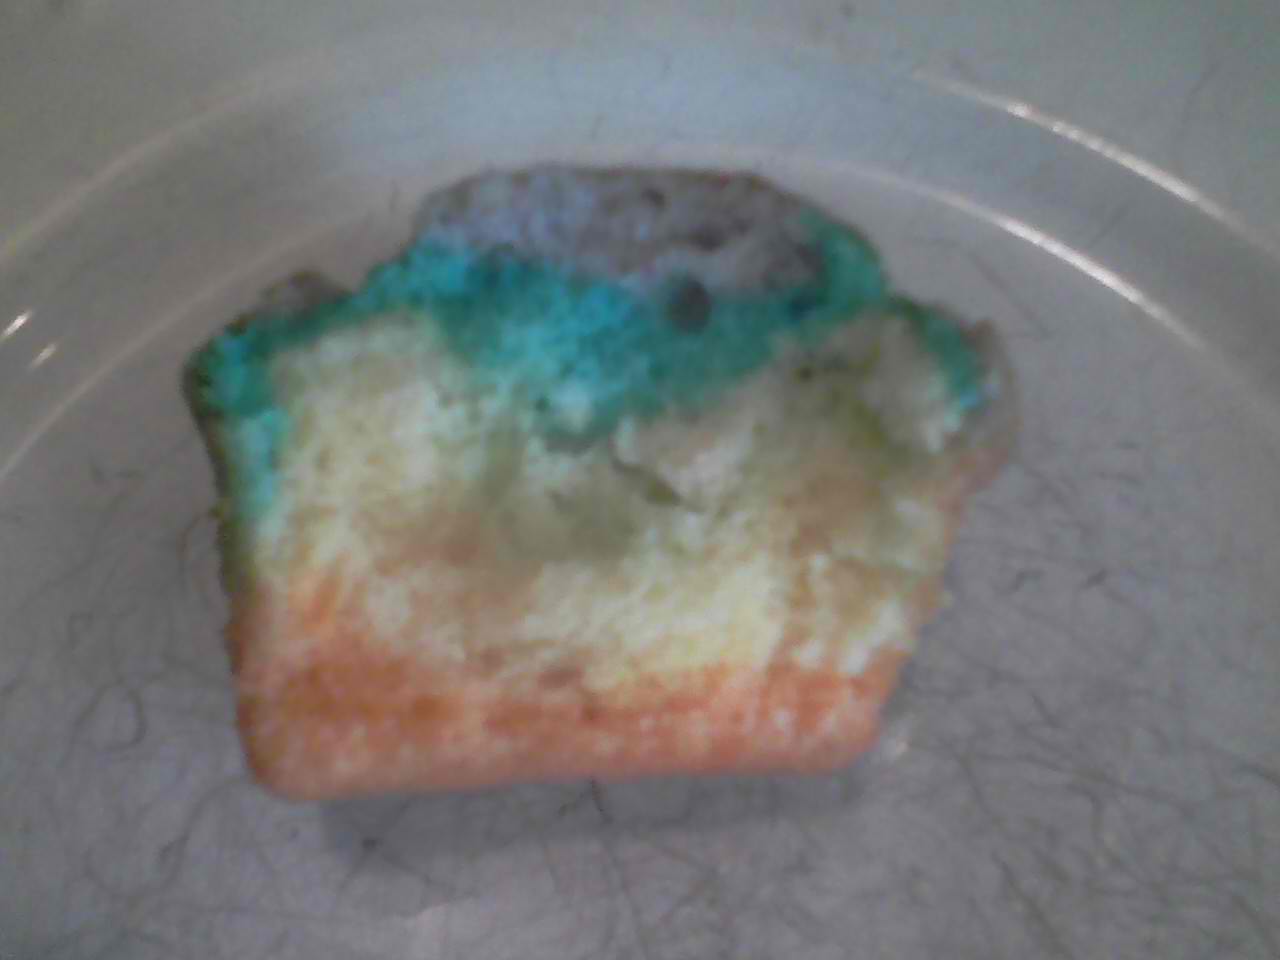
This week is not so much a recipe as an idea.  For St. Patrick's Day I made these rainbow cupcakes and they were a huge hit with the family.

Mix up your favorite white cake recipe or box mix. 
Divide the batter into six bowls. 
Put food coloring in each bowl to correspond with the colors of the rainbow.  Red, orange, yellow, green, blue and violet.  (Yes, I skipped indigo.)  I used gel food coloring but you could use the liquid colors and just follow the chart on the back of the package for orange and purple.
Layer the colored batter into muffin cups in the order of a rainbow.  I started with red on the bottom but it would be fine to go from violet up to red.
Bake as directed by your recipe.
Allow to cool completely.
Top with a cloud of whipped cream and enjoy.