Showing posts with label cooking. Show all posts

Friday, March 14, 2014

Monday Munchies: Vanilla Scones

Yes, I am aware that it's not Monday. I am listing this recipe as a Monday Munchies because I think it will make it easier for me (and hopefully, you) to find it later.

I make these on a regular basis. They are a favorite at my house, especially when I add chocolate chips to the recipe. Yesterday I took a basket of these scones to an event and was asked for the recipe several times. Surprisingly, when I looked for the recipe online I couldn't find it. So, by request, here is my recipe for vanilla scones.

Vanilla Scones

3 c flour
1/3 c sugar
2 T baking powder
1 t baking soda
1/2 c butter, softened
1 c vanilla yogurt
3/4 c add ins (dried fruit, chocolate chips, fresh fruit, nuts, etc.)

Preheat oven to 350°.
Mix together flour, sugar, baking powder, and baking soda. Add butter, and blend until mix resembles coarse cornmeal. Add yogurt and any add ins.  Mix gently to create dough. Turn dough onto lightly floured surface and divide into two parts.  Pat each dough half into a circle about 7" round, not quite 1" thick.  Cut each circle into 8 wedges and place wedges, slightly separated, on baking sheet.  Bake 15-20 minutes until lightly browned.

If dried fruit is used plump the fruit by covering the fruit with warm water and letting it stand for 10 minutes.

In a pinch you can substitute any flavor of yogurt for vanilla.  You can also substitute up to 1/2 c sour cream for the same amount of yogurt.

Monday, December 16, 2013

Buttermilk Scones with Chocolate Milk Drizzle


Today was a snow day so we spent the morning learning "How to Train Your Dragon" and enjoying a warm breakfast treat.  These scones were the perfect addition to a snuggly morning while the world outside the windows turned into a winter wonderland. 

Buttermilk Scones
Serves:  16 scones.

Ingredients:
3 cups flour
1/3 cup sugar
1 teaspoon salt
2 1/2 teaspoons baking powder
1/2 teaspoon baking soda
3/4 cup (1 1/2 sticks) unsalted butter
1 cup buttermilk

Directions:
Preheat oven to 400 degrees F. Combine the flour, sugar, salt, baking powder and baking soda in a large bowl. Add butter and mix with your fingertips to a coarse meal. Add buttermilk and mix just until combined.

Transfer dough to a floured surface and divide into 2 parts. Roll each to 3/4 inch thick rounds. Cut each round into 8 wedges and place slightly separated on a greased baking sheet. Bake for 18 minutes, or until lightly browned. Serve warm, split in half with butter and marmalade.

Chocolate Milk Drizzle

1/2 to 1 cup of confectioners sugar
2 T baking cocoa
2-4 T chocolate milk

Mix sugar and cocoa together until lumps are gone and color is uniform. Add chocolate milk one tablespoon at a time until drizzle is thick enough to spoon and drizzle over the warm scones.  You want it thinker than glue but not as thick as frosting. 


Monday, March 4, 2013

Monday Munchies: Buffalo Cauliflower


Spicy Buffalo Cauliflower 'Wings'


1 cup water
1 cup flour
2 tsp. garlic powder - I used Mrs. Dash and garlic pepper
1 head of cauliflower, washed, dried and chopped into pieces
1 cup hot sauce
1 Tbsp. olive oil

Preheat the oven to 450°F.
Combine the water, flour, and seasoning in a bowl and stir until well combined.
Coat the cauliflower pieces with the flour mixture and place in a shallow baking dish. Bake for 18 minutes.
While the cauliflower is baking, combine hot sauce and olive oil in a small bowl. Use a basting brush to cover cauliflower with hot sauce then continue baking for an additional 5 to 8 minutes.

This recipe came from the PETA website.

Thursday, February 28, 2013

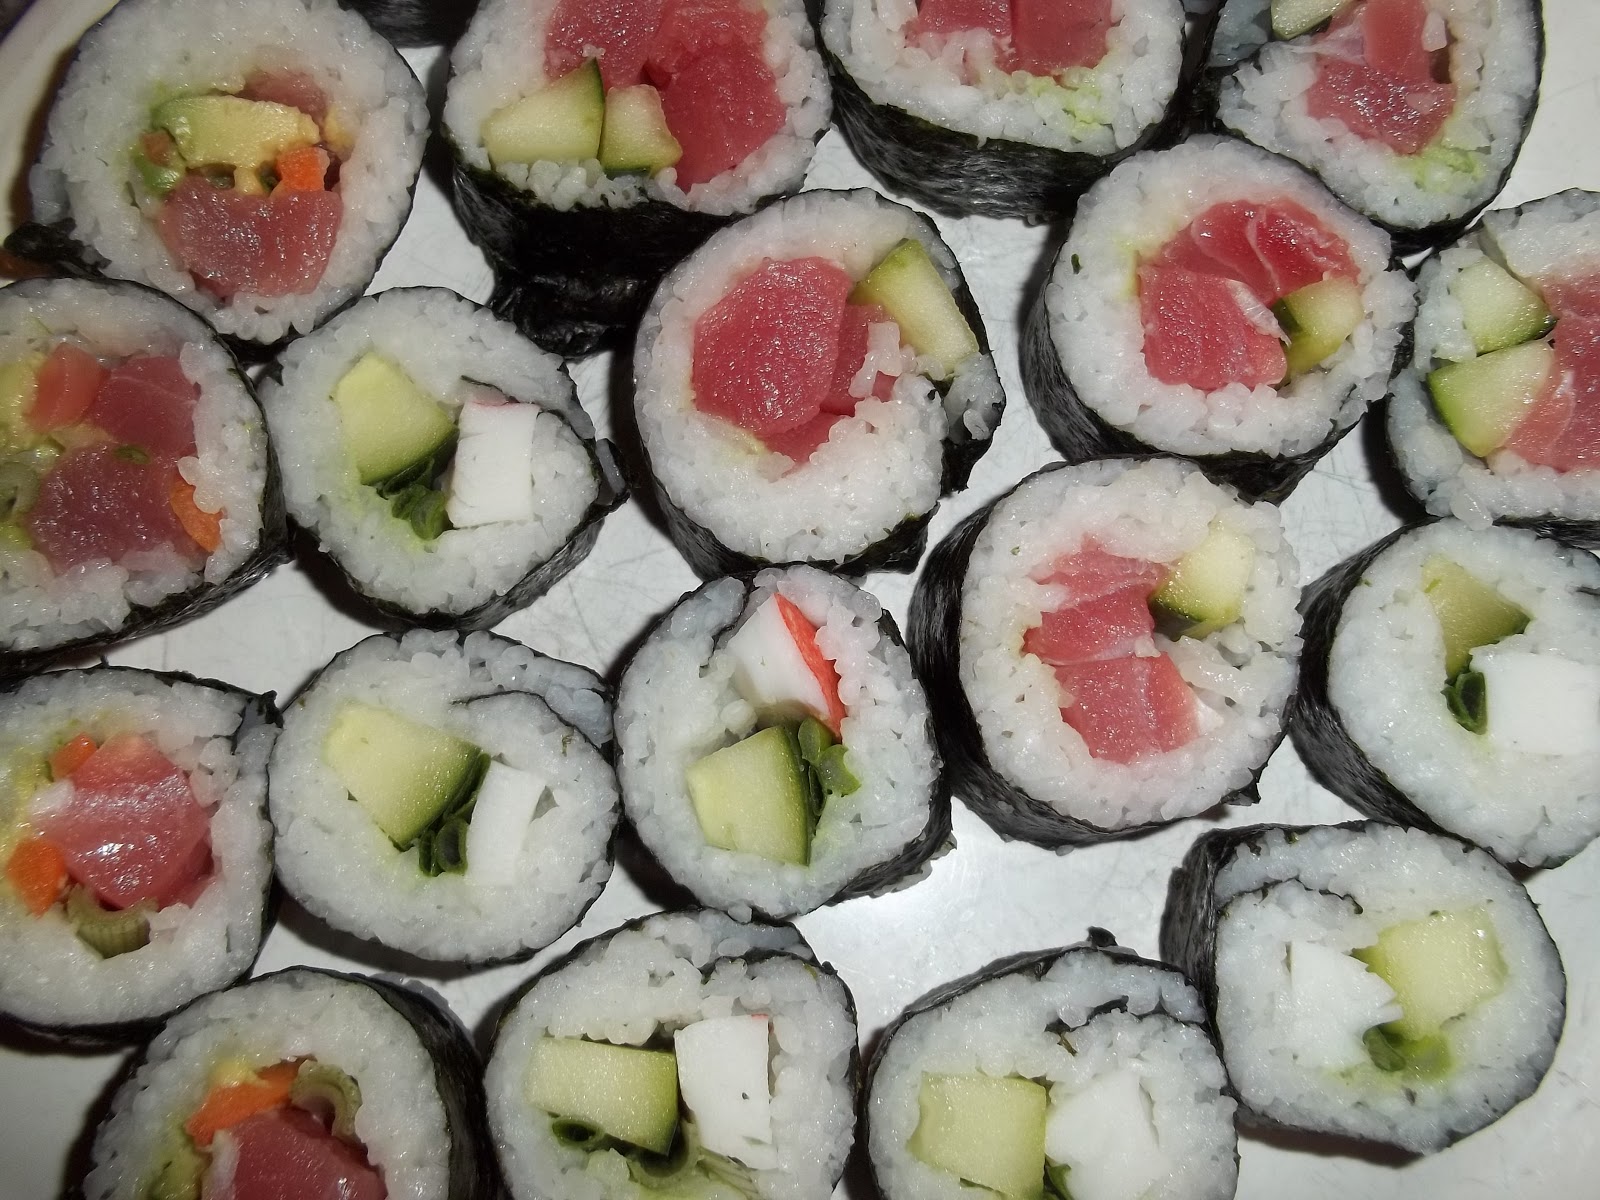
Sushi!


This is part of my effort at continuing education.  Last night I took a sushi class at The Cook's Shop.  The class was led by Chef Dave Rudie.  The time and supply fee were both great investments.

I can't get over how much sushi I was able to make for a fraction of the cost of what a sushi restaurant would charge the six of us.  We really can't get out of a sushi restaurant for less than $120.  I bought supplies for at least two sushi dinners with miso soup for less than $60. 

As an added bonus, I really love making sushi.  It's like art and food together.  Plus, it can't be rushed.  That makes sushi time the perfect time to enjoy a glass of wine while I create.

Monday, February 25, 2013

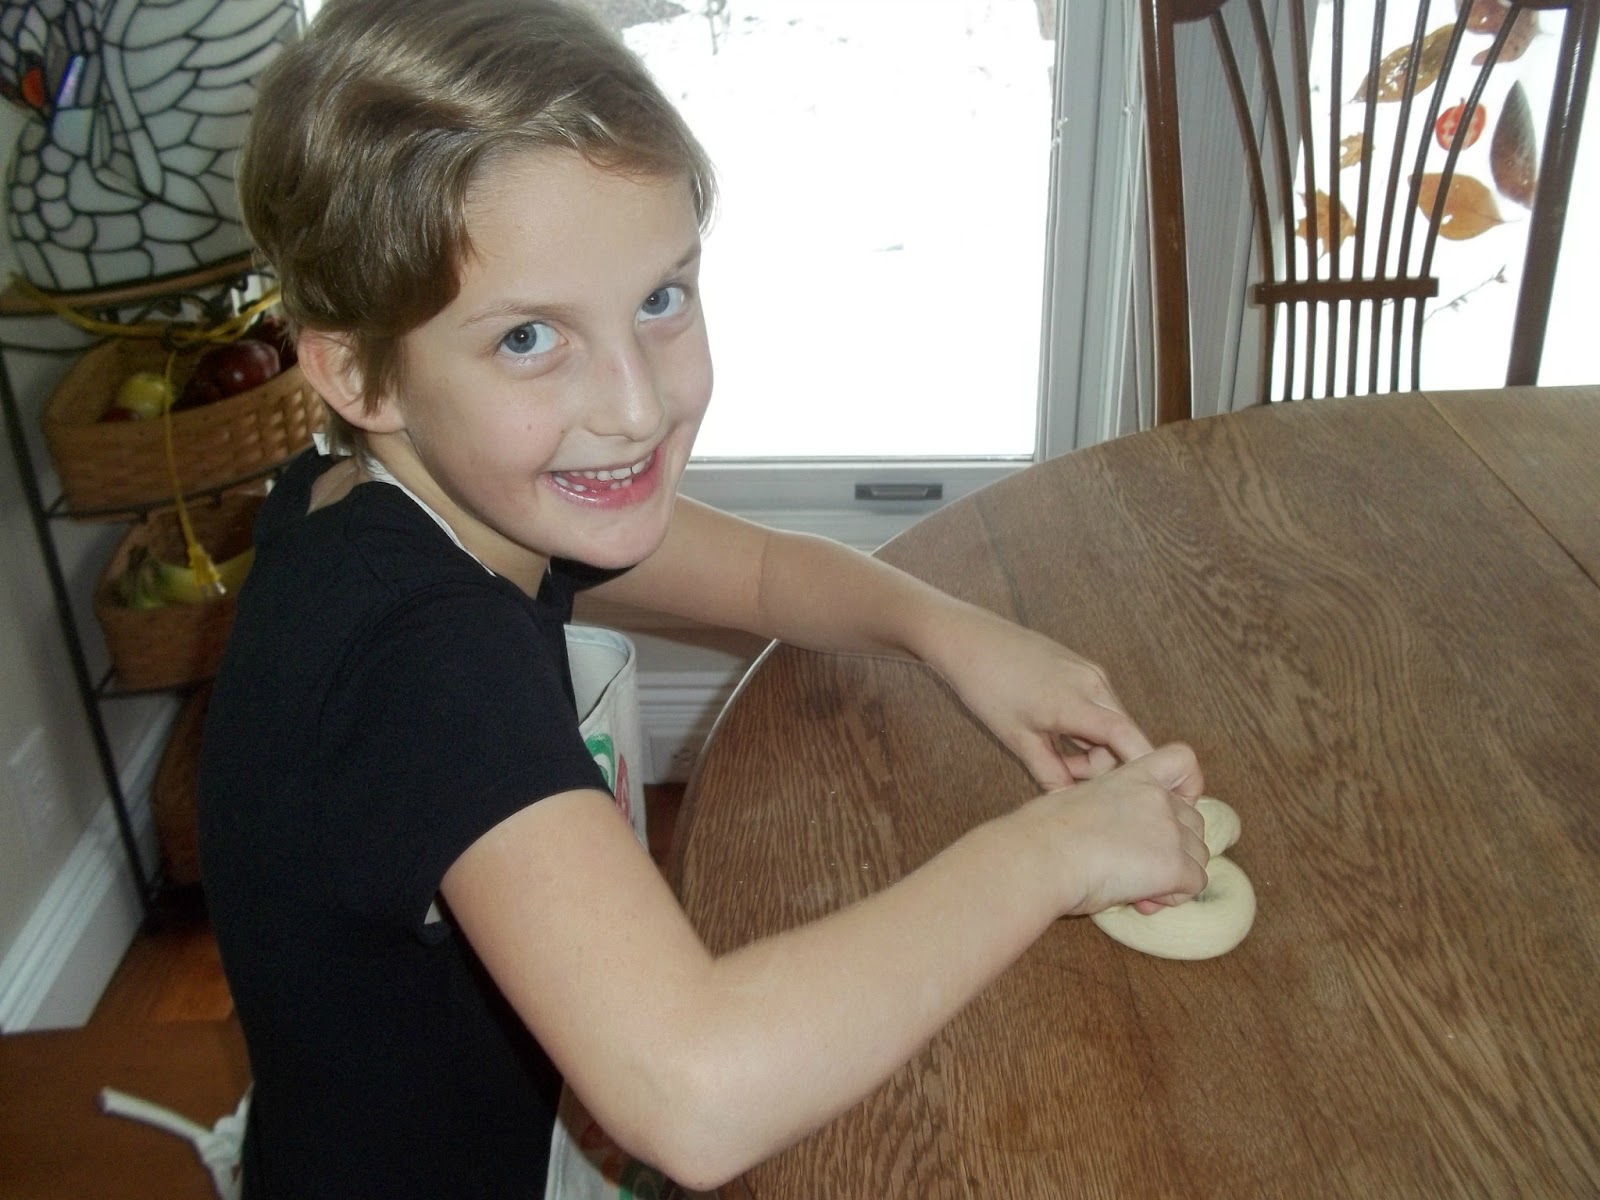
Monday Munchies: Pretzels

We used the soft pretzel recipe created by Alton Brown on the Food Network.  Those of you that know me will find this difficult to believe, but I followed the recipe and didn't change a thing.  When it comes to making pretzels I had absolutely no idea what I was doing and didn't want to screw it up.  Adhering to a better safe than sorry philosophy of pretzels paid off and we created magic. 


Tuesday, February 19, 2013

Dinner Tonight: Oven Roasted Barbeque Brisket and Roasted Fingerling Sweet Sweet Potatoes

Tonight we tried some new things.  I never cooked brisket before.  We are cleaning out the final cuts of our last steer from the freezer.  Brisket is almost all that is left.  Here's the recipe I chose to try:  Oven Roasted Beef Brisket I.  This recipe is for a four pound brisket.  My brisket is much smaller.  Of course, I made a few other adjustments to the recipe.

Oven Roasted Barbecue Brisket

1.5 pounds beef brisket
Mrs. Dash and garlic pepper to taste
1 cup barbecue sauce
1 cup beer

Preheat oven to 325 degrees F (160 degrees).
Sprinkle both sides of brisket with seasonings. Place in a large covered roasting pan.
Cook covered at 325 degrees F (160 degrees C) for 1 hour.  This is just the seasoned meat.  Nothing else should be in the pan at this point.
Cover meat with sauce, cover, and cook 1 hour longer.
Remove meat from pan, slice, cover with sauce and let rest for 15 minutes before serving.

Another item from the pantry that needed to be used was fingerling sweet potatoes.  M8 and I went to an auction in the fall and bought these cute little sweet potatoes.  All my normal sweet potato recipes call for much larger, peeled potatoes.  Clearly, something else was needed.  S11 commented tonight about how fortunate we are that we can go look for recipes to make anything.  He is so right! 

The recipe I found for our sweet potatoes was this one.  As so often is the case, I didn't have all the ingredients for the delicious sounding recipe so I took it as a jumping off point.  If you make the actual recipe, let me know.  I'd love to hear how it is.  This is what I ended up making.

Roasted Fingerling Sweet Sweet Potatoes
1 lb fingerling sweet potatoes, washed, cut into 1-inch chunks
1 T olive oil
1/3 c Brown Sugar
½ teaspoon Cinnamon

Preheat oven to 325 degrees F.
Toss sweet potatoes with olive oil, brown sugar and cinnamon.  Place in well oiled pan and cover.  Roast in preheated oven until tender, about 30-45 minutes.


Best of all both these dishes fit in the same over to be cooked at the same time.  I love it when that happens.  I have two ovens but I hate having to heat them both up for a normal dinner.

Monday, February 18, 2013

Monday Munchies: Beer Butt Chicken

A while back I posted about how to roast a chicken.  That is my go-to recipe for making chicken.  Only slightly less used at our house is the beer butt chicken technique.  I originally heard about doing this on the grill.  Coat your chicken in melted butter, slather on the salt and other seasoning, insert the beer can and cook on the grill until done.  It usually takes about an hour at 350-400 degrees. 

Grilling is amazing but sometimes it's not pleasant.  Right now grilling would be especially unpleasant so I opt for using the beer butt technique in the oven.  These handy beer can holders that I bought are convenient but not strictly necessary.  I have two of them.  If I'm cooking a third chicken I place it in between the two chickens on the can holders.  I pour out 1/3 to 1/2 of the beer.  Usually I opt to pour the beer into a glass for later consumption.

The chicken slips, bottom opening first, over the can and holder.
Before cooking I sprinkle the chicken with a saltless seasoning.  Since Rob's heart issues we have cut way back on butter and salt so I forgo the slathering and coating.  The chicken is still tasty and way more healthy.   

I like it when my chickens look chummy so I arrange them for conversation. 

I drop the lowest shelf of my oven all the way to it's lowest setting in order to accommodate the upright chickens.  While the chickens are cooking (375 degrees for an hour) I enjoy the beer I set aside earlier.

With no more fuss, the chicken is done and fall off the bone tender. 

Friday, February 8, 2013

A Delicious Birthday Dinner


S11 chose steak, Caesar salad and rolls for his birthday meal.  The sirloin steaks came from our own cattle.  It was too cold for me to want to grill steaks outdoors.  The steaks I've made indoors have not really been all that great so I went in search of a better steak recipe.  Thanks to Jessie Cross at The Hungry Mouse I found this recipe.  It's not so much a recipe.  It's more a technique.  It is easy, delicious and the only way I will make steak when the grill is not a good option.  Honestly, I may even do this when the grill is a good option.  Seriously, go check out The Hungry Mouse.  Even if you don't want to make steak there are a ton of recipes and other things over there and the pictures are gorgeous.

To go with the steak I tried a new roll recipe from my KitchenAid cookbook.  It was perfect!  I'm always struggling to get bread made in time for dinner.  For some reason, thinking of side dishes at 3pm just doesn't come easily.  This recipe is a wonderful solution to my inability to get my timing right.
KitchenAid Sixty-Minute Dinner Rolls

1/2 cup low-fat milk
1/4 cup sugar
3 tablespoons butter
 6 3/4 teaspoons dry active yeast (3 packages yeast)
1 1/2 cups warm water (105F – 115F)
5 – 6 cups all-purpose flour

In a small saucepan,over low heat stir milk, sugar, and butter together. Heat over low heat until butter melts. Cool until lukewarm.

Dissolve yeast in warm water in warmed mixer bowl. (I warm my mixer bowl by filling it with hot water before I need it.  Right before I'm ready to get started I empty the bowl, dry it, and attach it to the mixer base.)  Add lukewarm milk mixture and 4 1/2 cups flour to yeast mixture.  Using a dough hook, mix on low speed for about 1 minute. With the mixer still going, add remaining flour, 1/2 cup at a time, and mix about 2 minutes until dough starts to clean the sides of the bowl. Knead on low speed for about 2 more minutes, or until dough is smooth and elastic – the dough will still be slightly sticky to the touch.

Place dough in a greased bowl, turning it to grease the top. Cover the dough with a clean, dry dish towel, and let it rise in a warm place, free from draft, for about 15 minutes.

Turn the dough onto a lightly floured surface, and divide into 24 equal pieces. Form each piece into a ball, and place on baking sheet.  Cover the rolls with the dish towel, and let the dough rise for about 15 minutes. (The recipe in the book suggests making fancier rolls by cutting the large rolls into four equal pieces and cooking them in a muffin pan or rolling them out and making curlicues.  To me, that adds to the time and effort required.  Complicated isn't necessarily tastier.)

Bake at 425ºF for 12 minutes, or until the rolls are golden brown. Remove from pans immediately, and cool on wire racks.


Monday, February 4, 2013

Monday Munchies: Brownie Batter Dip

This recipe is brought to you thanks to H13.  She made it last night as part of our Super Bowl snacks.  If your family is like ours, the food and the commercials are the main reason for watching the game.  With that understanding, you can see how important it is to make the food good.  H13 certainly came through with this tasty treat.

You can find the recipe here at Our Every Day Dinners but I wanted to post it again so you don't have to go looking.  I would recommend that you check out the site though.  There's lots of good stuff there. 

Brownie Batter Dip

1 8 oz package softened cream cheese

1/2 cup softened butter
2 cups powdered sugar
heaping 1/4 cup cocoa powder
heaping 1/4 cup flour
3 tablespoons brown sugar
1 teaspoon vanilla
2 tablespoons milk, adding more if needed

Mix the cream cheese and butter with an electric mixer. Add the powdered sugar and milk slowly. Add the cocoa, flour, brown sugar, and vanilla, and mix well.

We served the dip with pretzels, graham crackers, and unsweetened banana chips.  The unsweetened banana chips are, frankly, nasty on their own, but they were just right with this dip.

Also, we didn't have any powdered sugar.  A few years ago that missing ingredient would have sent us searching for another recipe.  We've come a long way in the do it yourself department so H13 made her own powdered sugar.  And guess what, powdered sugar is just regular sugar... wait for it... powdered.  Who knew?!  If you need powdered sugar you put the equivalent amount of white sugar in a blender and blend/pulse until you have sugar that is... you guessed it ...powdered.  I know, it's amazing, isn't it?!  If you want a more serious set of instructions check here but the ones that I've given really do work.

Anyway, with or without the diy powdered sugar this brownie batter dip really is worth making and sharing.

Monday, January 14, 2013

Monday Munchies: Butternut Squash Soup

One of the things that I enjoy about my cooking is my ability to re-purpose leftovers in a way that my family will eat them.  My family is not a family that enjoys leftovers.  Other than pizza, they would all be happy never to have a second helping of a meal, especially if it is served a day or two later.  Dealing with that pickiness requires patience and creativity on my part. 

Right now, my refrigerator is full to overflowing.  My goal with dinner tonight is to use what I have on hand to create a meal that is new and appealing to the majority of my family.  I have half a loaf of multi-grain bread in the pantry.  I also have a variety of antipasto treats; pepperocini, salami, olives, roasted red peppers.  That makes a good starter. 

I don't have enough meat of one kind to reserve but I do have six cups of chicken broth that I made from last week's beer butt chicken.  I also have about 8 dozen eggs.  We had quiche yesterday for breakfast so no one is really interested in more eggs for dinner tonight.  I also have six cups of roasted butternut squash from dinner last week.

A quick search on allrecipes.com and I have this recipe for Butternut Squash Soup.


As you know, I can't leave well-enough alone so I am changing a few things.  Here is my recipe for Butternut Squash Soup:

1/2 onion, finely chopped
2 tablespoons margarine
6 cups peeled and cubed, roasted butternut squash
4 cups chicken broth, divided
1/2 teaspoon dried marjoram
1/4 teaspoon ground black pepper
1/8 teaspoon ground cayenne pepper
2 (8 ounce) packages light cream cheese or Neufchatel

In a large saucepan, saute onions in margarine until tender.
Using a blender puree squash with 1/2 to 1 c of chicken broth and cubed Neufchatel.  This took me two batches.
Add remaining chicken broth to sauted onion.  Stir in blended squash and cheese mixture.
Add marjoram, black pepper and cayenne pepper to soup and heat through. Do not allow to boil.

I have been warming my soup for about an hour on the stovetop to allow the flavors time to meld and Rob time to get home from the gym.  I am pretty sure dinner will be a hit tonight.  The best part is that I've gotten three plastic containers out of my refrigerator.  It's nice to be able to open and close the door without fear of an avalanche.

Follow up:  The soup was a hit with six out of seven diners.  I doubt it will be a regular feature on our menu but it was a delicious way to use the butternut squash and an easy, different recipe to pull out every now and then.

Thursday, October 4, 2012

Beware of the Capsaicin

Today I decided to tackle the job of processing the jalapenos from our garden.  I picked out a recipe for easy jalapeno jelly and, even though I didn't have enough sugar to do the canning, I decided to go ahead and stem, seed and vein the jalapenos.  I read through the recipe tips, got my gloves and began to carefully cut the jalapenos.
 
About halfway through the jalapeno mountain my hands started to tingle.  I switched to a new pair of gloves.  My hands began to burn.  I finished 2/3 of the jalapeno pile and cried uncle.   
My hands were on fire so I washed them with soap.  The burning continued.  I did a quick check on the internet to see if there were tips to help ease my pain.  There were several suggestions:


Vegetable oil provided relief for a few minutes and then it didn't.

Unfortunately, the advice given didn't include drinking the alcohol.  Rather, I was to pour it over my fiery hands.    While this was more successful than the oil, I couldn't see soaking my hands in alcohol every few minutes to keep the burn away.  Since alcohol was suggested and I didn't have rubbing alcohol, I tried to think of something that was high in alcohol but not liquor.  This fit the bill. 
And, it worked.  I reapplied several times and waited several hours before the burn went away completely but, hands down, the hand sanitizer was the best solution.

From my jalapeno experience I have determined that if I can't even cut them without pain there is no good reason for me to ever grow or eat these precarious peppers again.

Monday, May 14, 2012

Monday Munchies: Roasted Chicken

Here's the sad thing.  Until six months ago, I had no idea how easy and delicious roasted chicken was.  I had never, ever cooked a whole chicken.  I bought skinless, boneless frozen chicken breasts because I hated handling raw meat.  Then we bought the farm and raised a hundred chickens.  We butchered 96 of those hundred and handling raw meat was no longer an issue.  What to do with lots of frozen, whole chickens became the issue. 

To use chicken in the recipes I'd favored in life before the farm I needed several pounds of chicken breasts.  Our chickens didn't provide breast meat like that so my cooking needed adjustment.  A friend recommended we try beer butt chicken.  I tried it and we loved it.  I brush my constipated chickens with butter, sprinkle them with seasoning and cook them in the oven two or three at a time.  I use the oven rather than the grill mainly because we started cooking chicken this way in December and I'm not wild about manning the grill for an hour in cold weather. 

One day I needed to cook two chickens for dinner and had no beer in cans.  Rather than run out to the store I decided there had to be something else I could make.  There was and it tunred out to be easier than popping the top on a can of beer, roasted chicken

Here's the the happy thing.  Not only is roasting a chicken super easy but it looks very impressive. Plus, I got to learn a new skill, how to truss a chicken. I  love learning new things! I also love it when the food I make looks and tastes great.

For those of you that have been roasting chicken for years, three cheers to you.  For those of you that never purchased a whole chicken before, be brave.  You just might love it. 

Monday, April 23, 2012

Monday Munchies: Chocolate Chip Banana Muffins

This recipe began with a basic banana loaf recipe found in my favorite Southern Living Cookbook.  My children will tell you that it's good enough to be served in a bakery.

1 3/4 c of flour
3/4 t baking soda
3/4 c sugar
1 1/4 t cream of tartar
2 eggs, beaten
1/2 c vegetable oil
2 ripe bananas, mashed
1/2 c to 1 c chocolate chips

Preheat oven to 350.
Mix first four dry ingredients. Make a well in dried ingredients.
In a small bowl mix remaining ingredients. Pour wet ingredients into well of dried ingredients.  Fold gently until all ingredients are moist.  Fold in chocolate chips.
Spoon batter into muffin cups.
Bake for 20-25 minutes or until golden brown.
Makes a dozen muffins.

Monday, March 26, 2012

Monday Munchies: Southern Living Chocolate Chip Coffee Cake

I received The Southern Living Cookbook as a wedding gift.  For the past 25 years it has been my trusted source for delicious food.  This recipe for Chocolate Chip Coffee Cake is a family favorite.  You'll find us eating it while we watch the Macy's Thanksgiving Day Parade and the Rose Bowl Parade.  It's also the breakfast request on most birthdays.

Chocolate Chip Coffee Cake

2 c flour
2 t baking powder
1 1/2 c sugar
1/2 c butter, softened
2 eggs
3/4 c milk
1 t vanilla
6 oz chocolate chips

Combine flour, baking powder, sugar and butter in bowl and beat at slow speed of a mixer until mixture resembles fine crumbs.  Set aside 1 cup of crumb mixture.

Add eggs, milk and vanilla to remaining crumb mixture.  Mix well. 

Pour batter into greased 7x11 pan.  Sprinkle with chocolate chips.  Top with reserved crumb mixture.

Bake in 350* preheated oven for 35-40 minutes.

Cool slightly and serve.
My children actually prefer this one cool so making it the night before suits them fine.

Monday, March 5, 2012

Monday Munchies: Baking Bacon

This isn't really a recipe, it's just a great idea.  In the distant past, I fried my bacon in a pan.  Even in my largest frying pan it's impossible to fit enough bacon for six people.  Also, the act of frying is irritating.  I hate being burnt by popping grease and it makes a huge mess.

A number of years ago someone introduced me to the idea of preparing bacon in the oven.  I honestly can't remember who it was so if it was you, please, speak up!  Baking bacon is less messy, requires less hands on time and it less painful. 

Any large baking pan with a lip on it is perfect for cooking bacon.  I use a large bar pan but a jelly roll pan would work fine.  If you are cooking less than a pound of bacon you might even use a 9X13 pan. 

Open the package of bacon and separate each slice laying it on the pan.  You can overlap the slices if you need to but don't stack them. 

Put them in the oven at 400 for about 15-20 minutes depending on how crunchy you like your bacon.

Remove pan from oven.  Drain bacon.  Enjoy!

Monday, January 30, 2012

Monday Munchies: Raspberry and White Chocolate Fudge Brownies

I've been trying some new recipes that I really love.  I've also been struggling to make my blog more regular and easier to manage.  Enter Monday Munchies.  Each Monday I'm going to share a recipe that I've made and enjoyed.  Chances are these won't be totally original recipes nor will the pictures be mine but I'll link you up to my source so you can check it out for yourself.  I will be adding my version of each recipe because I can't follow directions when it comes to cooking no matter how hard I try.  I hope you find something here that inspires you to munch.

For the first Monday Munchies I'm sharing a recipe for Raspberry and White Chocolate Fudge Brownies.  I found this recipe while searching for a way to use some raspberries frozen from our garden.  My children aren't particularly fond of raspberries and I didn't want to waste them but really didn't have any go-to recipes for raspberries. 

The first recipe that caught my eye was for Raspberry White Chocolate Scones.  The pictures are amazing and they look delicious but the recipe called for grating frozen butter.  I'm a lazy, impulsive cook and this seemed like something I'd never get coordinated.  Honestly, the only reason I can make things that call for softened butter is because I can do that in the microwave.  So my search continued.  The other challenge is that this is the end of the month and I overspent my grocery budget so whatever I make must come from the ingredients on hand.

This is the recipe I'm sharing and it's a keeper.

Raspberry and White Chocolate Fudge Brownies

½ c white chocolate chips
1 c flour
1/2 c sugar
¼ c unsalted butter
1 t vanilla
2/3 c white chocolate chips
1 c raspberries, fresh or frozen

Preheat oven to 325 degrees F. Grease 8 inch pan. Heat 1/2 c white chocolate chips in microwave 30 seconds, stir and heat at 30 second increments until melted and smooth.
With mixer cream butter and sugar, add eggs and vanilla. Add melted white chocolate. Stir in flour until just blended. Fold in white chocolate chips. Gently fold in raspberries. Spread evenly in baking pan. Bake 40-45 minutes.

Now, this really is a fool proof recipe because H12 made it for us and she added the melted white chocolate chips to the butter, eggs and vanilla before she added sugar.  The recipe also called for softened butter but H12 went straight for melted butter and that worked fine.  After I watched her scraping white chocolate and egg gunk off the inside of the mixer bowl I did an eye roll and a huffy breath and she kicked me out of the kitchen. Like I said, this is a 12 year old master cook proof recipe.


Wednesday, January 4, 2012

What's for Dinner?

There has been discussion several places I've been recently, both in real life and on the web, about fixing dinner for the family.  Since I've got a plan for this I thought I'd share it with anyone that's interested.  Sometimes I even stick to it myself.

The thing I like about this plan is that it's easy to take out the meals I make and substitute your own or to rearrange the days.  Years ago, I wrote down all the meals I could think of easily that my family likes.  That was my first meal plan.  I think there were 25-30 meals on the list and I just rotated through them, adding in a new meal whenever I had time or energy.  That worked fine too.  This day of the week rotation just gives me a little more structure and makes it easier for me to focus.

I try to buy fruit in season so that would change according to what is fresh and local.  The same is true of the vegetables.  Right now we are eating lots of chicken because we just filled our freezer with our own chickens.  In a few months we'll probably be eating a lot more beef.   As far as ease of preparation, sometimes I make everything from scratch other times I buy what is convenient.  It depends on the pace of life at a given time.

Menu Plan


Monday - sandwich/casserole
Tuesday - soup/crockpot
Wednesday - ethnic food
Thursday - leftovers
Friday - seafood/steak
Saturday - pizza
Sunday - dinner/out

Sunday
pork roast, rolls, roasted potatoes, salad
ham, sweet potatoes, salad, rolls
baked chicken, stuffing, green beans, rolls
lasagna, salad, bread
stuffed shells, salad, bread
beef butt chicken, broccoli, rolls

Monday
pulled pork sandwiches, coleslaw, baked beans, chips
sloppy joes, buns, pasta salad, veggies & dip
hamburgers, buns, fries, veggies and dip
hot dogs/brats, buns, broccoli salad
mac & cheese, smoked sauasage, steamed broccoli with cheese
chicken broccoli casserole, rice, salad
meatloaf, mashed potatoes, corn
skillet chicken casserole, salad, bread
chicken pot pie, baked apples

Tuesday
taco soup, cheese, sour cream, chips & salsa
perfectly potatoes and ham, green beans, rolls
pasta fagioli, salad, bread
white chicken chili, salad, cornbread
Merlot beef stew, salad, rolls
slow cooked teriyaki chicken, green beans, rice
cheesy slow cooker chicken, rice, salad
vegetable soup, cheese, crackers

Wednesday
spaghetti & meatballs, salad, bread, applesauce
nachos, sliced apples/pears/oranges
beef & broccoli stir fry, rice, eggrolls, pineapple
chicken & broccoli alfredo, salad, bread, applesauce
chicken enchiladas, refried beans, chips, salsa, sliced apples
chicken and veggie stir fry, eggrolls, rice, pineapple
tacos, refried beans, chips, salsa, fruit

Thursday
Leftovers

Friday
steak, salad, potato, bread
shrimp & grits, green beans, salad, rolls
Asian shrimp & pasta, salad, bread
baked fish, veggies, rice
shrimp boil, salad, cornbread
shrimp scampi, salad, bread
salmon teriyaki, green beans, rice

Saturday
pizza, veggies & dip

Sunday, November 13, 2011

Thanksgiving On My Mind

I intended to prepare the second Redwall Feast with S9 this weekend then I became obsessed with Thanksgiving.  I started looking at recipes, thinking about seating and napkins, and planning sleeping arrangements.  I also spent some time on Saturday morning talking about the menu with my husband. 

During our conversation, my husband began to wax poetic over the rolls he remembered from our junior high school cafeteria.  Yes, we went to junior high together.  Yes, the rolls were worth remembering.  They were tall and buttery.  They were served warm and they pulled apart in a light and fluffy goodness that can best be compared to cotton candy.  They were exquisite.

I have always made my own bread.  I have my grandmother's tried and true bread recipe that I use for almost all my bread needs.  It makes lovely pizza dough, cinnamon rolls, loaves and rolls.  It is delicious but it is not light and fluffy and it does not pull apart like cotton candy.  So, I went on a quest to find a contender to stand up to childhood memories. 

This is the recipe I found and it is the one we will be enjoying on Thanksgiving day.  These rolls were light and fluffy and if they didn't pull apart exactly like cotton candy, they were pretty close.  The recipe calls for a heavy duty mixer.  I did all the mixing and kneading by hand and it worked fine.  I also left out the dough enhancer and the rolls were lovely.

“Sunday Best” Dinner Rolls


Added by Terri @ that's some good cookin' on July 27, 2011 in Breads, Dinner Rolls
Servings 36
Ingredients
• 2 Tablespoons Yeast
• ½ cups Sugar Plus 1/2 Teaspoon, Divided
• 2 cups Warm Water, divided
• ½ cups Butter, Melted, Plus More To Dip The Rolls In
• 3 whole Eggs
• 7 cups To 8 Cups White Flour
• ½ cups Powdered Milk
• 2 Tablespoons Dough Enhancer
• 2 teaspoons Salt

Preparation Instructions
Dissolve yeast and 1/2 teaspoon of sugar in 1 cup warm water.

While the yeast is proofing, add the remaining 1 cup of warm water, melted butter, remaining 1/2 cup sugar, and eggs to the mixing bowl of an electric mixer such as a Bosch or KitchenAid. When the yeast has doubled (it only takes a few minutes), add it to bowl. Mix on low speed just until the ingredients are combined.

Add 4 cups flour, powdered milk, dough enhancer, and salt. Mix on a medium speed for 7-10 minutes. Turn off mixer and let mixture rest for 10 minutes.

Add 2 more cups flour and mix on medium speed until ingredients are well incorporated. With mixer running, add more flour, 1/2 cup at a time, just until the dough cleans the side of the bowl. This is an important step because it marks the difference between a roll that has just the right amount of flour and one that has too much or too little flour. Turn the mixer to a higher knead setting and let the mixer do its thing for 8-10 minutes until the dough is very smooth and elastic.

Turn off the mixer and let the dough rest for 10 minutes. I leave the dough in the mixer bowl. This is where you really save time on this recipe. After the dough has rested, you can start forming the rolls.

Lightly butter a 9 ” x 13″ metal pan. Use a metal pan, not a glass baking dish. Pinch off enough dough to form a 1 1/2″ ball. You can vary the size of your rolls by how much dough you choose to make each one. Sometimes you might decide that you want bigger rolls if you are using these for sandwiches, sometimes you might be in the mood for something a little more traditional. Look at the amount of dough you are using for your roll and imagine it double its visible size. That’s how big your finished product will be—maybe even a little bigger. I make my rolls so that I can get 4 rolls across the pan and 5 rolls lengthwise.

Dip each roll into some melted butter before putting them into the pan. The butter provides two things: it allows the rolls to make a wonderful top and bottom (the corner rolls are my favorite because they have two outside browned sides, a brown bottom, and a lovely golden brown top) and the rolls separate easily from each other after they are baked.

Cover the pan with plastic wrap and set the rolls in a warm place to rise. It takes about an hour for the rolls to rise; sometimes only 30-45 minutes, depending on how happy the yeast is that day. You can get some good talking done while the rolls are rising.

Once the rolls have doubled in bulk, remove the plastic wrap and bake the rolls at 375ºF until they are golden brown, about 20 minutes. You can brush a little more butter on them, if you want to. It makes them extra pretty.

By the way, this recipe can make about 4 dozen rolls. You could make a pan of rolls and use the rest of the dough for cinnamon rolls or scones. Just a thought.

Sunday, November 6, 2011

A Feast Fit for Redwall

During our history lessons last year my son, then 8, discovered The Redwall series by Brian Jacques.  We listened to the first novel on cd and he was captivated.  Since that time he has made a steady diet of the rest of the books in the series.  He devours everything Redwall.  In the course of his reading, we learned so much about a wide variety of animals with which I was totally unfamiliar.  Stoats, pinemartens, voles, sables, ermin, sloworms. 

We also learned about an entirely new kind of food. Pasties, ales, custards, tarts, leeks, nunnymolers. The Redwall books are full of feasts.  The descriptions that Jacques includes in every one of the books is sure to leave even the pickiest eater drooling.  Even the everyday meals are worth a few lines. 

A few days ago, I was online reserving the Redwall books that S9 hadn't read yet.  In my search, I came across The Redwall Cookbook.  S9 was beyond thrilled.  The opportunity to taste what he'd been reading about for the last six months was a dream come true.  He spent hours reading the cookbook then he pulled me into his plan.

A feast fit for Redwall was his goal.  He'd gone through the book and picked out fifteen recipes that he thought would be perfect for our Redwall feast.  While I appreciated his appetite and his vision, I couldn't get my mind around cooking fifteen dishes, many of which included things like turnips and currants.  After some discussion we decided that having several feasts and a tea or a special snack might be more manageable.  We made a menu for each meal and tea and then S9 made the grocery list while I read the recipes. 

Tonight was our first Redwall feast.  S9 helped me with all the preparations.  It was the first time he'd spent that much time helping me with a meal.  His job is usually setting and clearing the table.  Meal prep was new to him.  He loved the roll of chef.  He peeled carrots and turnips, cracked eggs, stirred custard, sauteed onions.  His culinary skills doubled in one evening.  

Our feast consisted of salad, cornbread, Shrimp'n'Hotroot Soup, Mole's Favourite Deeper'n'Ever Turnip'n'Tater'n'Beetroot Pie, Honeybaked Apples with Custard Sauce and Mossflower Mulled Cider.  I think we were all surprised by how much we enjoyed the food.  Not everyone liked every dish but everyone found something that they enjoyed.  S9 ate everything and asked for seconds of the Shrimp'n'Hotroot Soup and then asked for thirds.

Our Redwall feast was a total success.  I might even add Shrimp'n'Hotroot Soup to our regular meal rotation.  We've got plans for several moreRedwall meals.  S9 can't wait to take on the roll of chef again and I'm looking forward to enjoying the delicious tastes of Redwall.

Sunday, October 10, 2010

Processing Pumpkin: Three Tasty Treats

One of the most wonderful things about fall is pumpkins.  Just looking at them makes me smile.  Their gorgeous orange color, the variety of sizes, shapes and textures.  Add to their aesthetic qualities the fact that the pumpkin is infinitely useful, nutritious and delicious and that is cause for celebration.  So, during this week, we celebrated the pumpkin.

Our first pumpkin of this season was a $1.79 pie pumpkin from Linda Fraley's market which we turned from a lovely orange globe into a variety of tasty treats.  We began by slicing our pie pumpkin in half and scooping out the seeds. 
S8 wasn't thrilled about this part of the job.
After slicing the pumpkin we put it, cut side down, on a baking sheet and baked it for about 90 minutes at 350 degrees.  The key is baking until the pumpkin is tender.  The rind should just peel right off and the pumpkin should mash with a fork.

Here's our cooked pumpkin.
We ended up with four cups of cooked pumpkin and a bunch of seeds.
H11 and S8 make 2 cups of our cooked pumpkin into our favorite pumpkin cookies.

You can find the recipe for our First Sign of Fall Pumpkin Cookies on my blog.
H11 took the pumpkin seeds and made them into a salty snack.
First she got all the pumpkin goo off the seeds and dried the seeds overnight.

Then she boiled them in salty water for 8 minutes.  Finally, she microwaved the seeds in oil until the seeds were lightly toasted and crispy.  She stirred the seeds every minute to make sure they didn't stick or burn.
We'd recommend you follow the directions here to make your own pumpkin seeds.  There are shorter methods for microwaving pumpkin seeds and we'll be trying those next time.

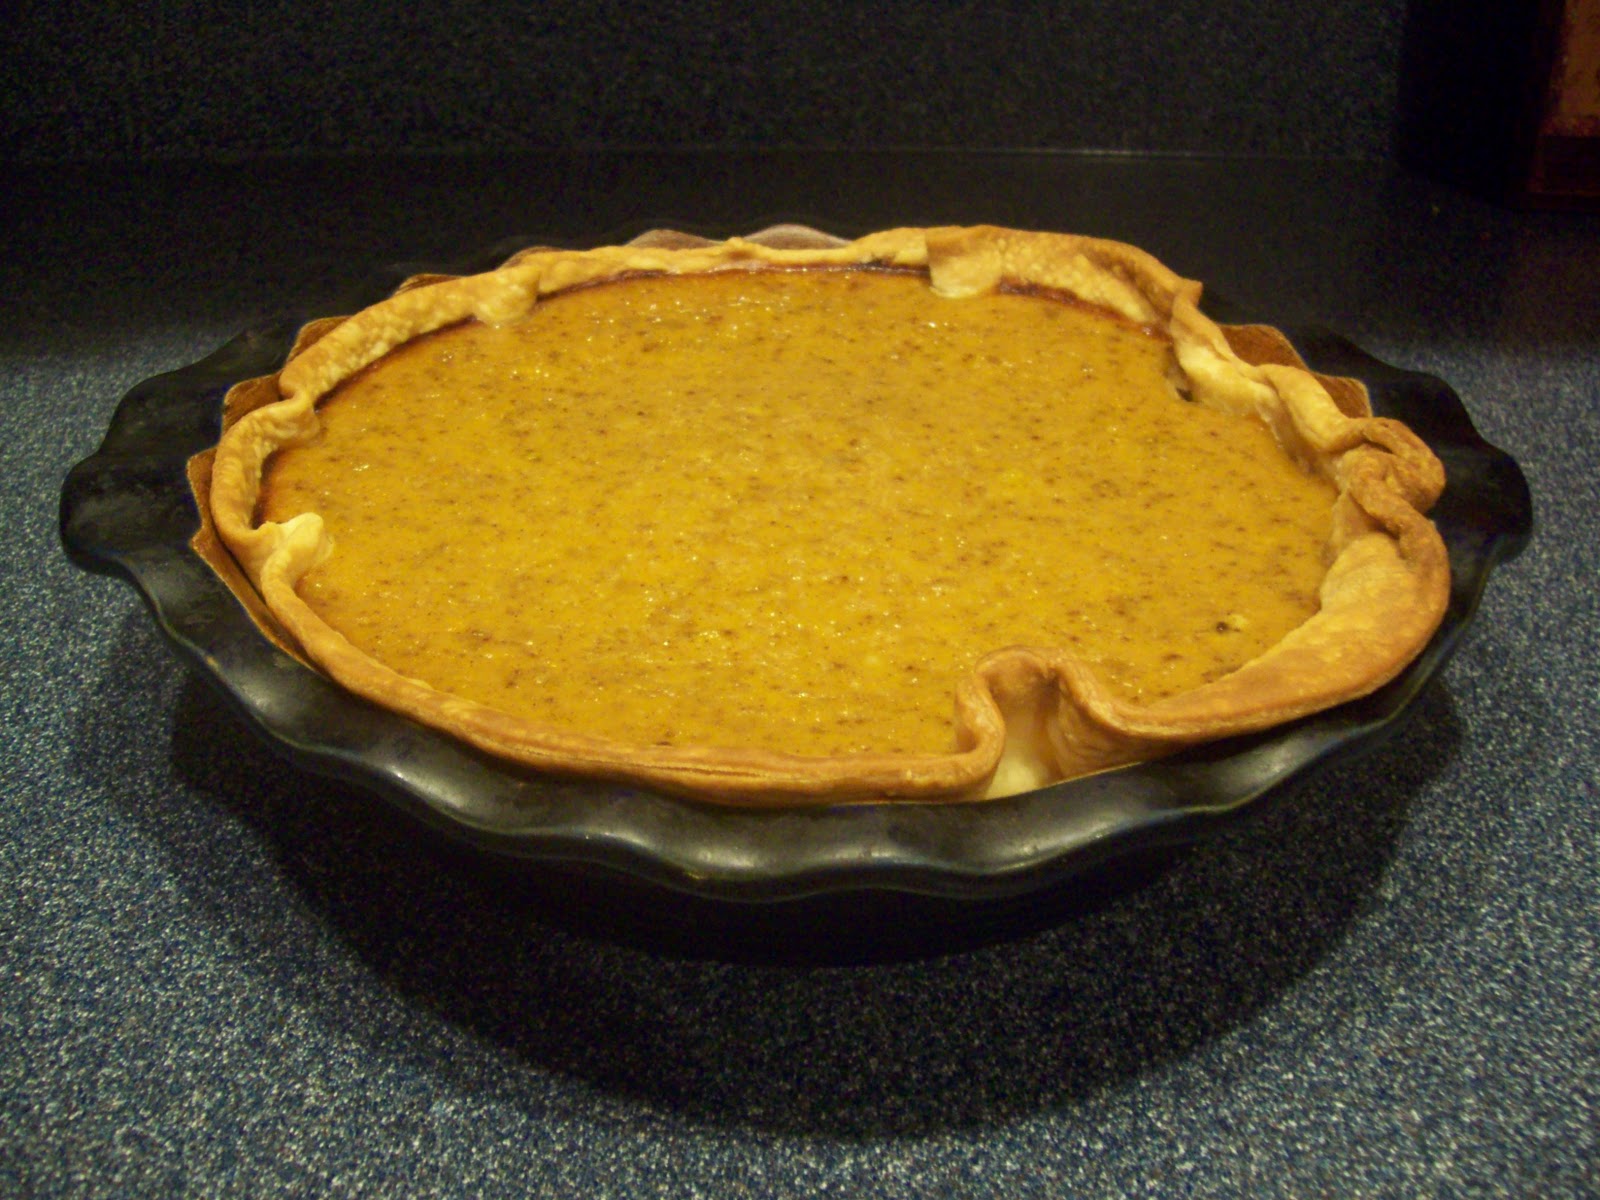
Finally, we made the first pumpkin pie of the season.  I'll decide tomorrow whether to post the recipe.  The pie is still warm and while the taste is good, the texture is a bit off.  I'll pass a final verdict on it's shareability after the pie has had a night to rest.